How to Install Illustrator Brushes
Share
Here’s a quick and easy Illustrator tutorial on how to easily load new custom brush set into Adobe Illustrator. It can be a little confusing to add new brush collection in Illustrator if you’ve never done it before (since it is different from how to install Photoshop brushes). However, once you’ve done it once, it is pretty simple.
Let’s do this…
1) Make the Brushes palette visible.
If the brush palette isn’t already visible, navigate to Window > Brushes to display the brush palette. See below image...
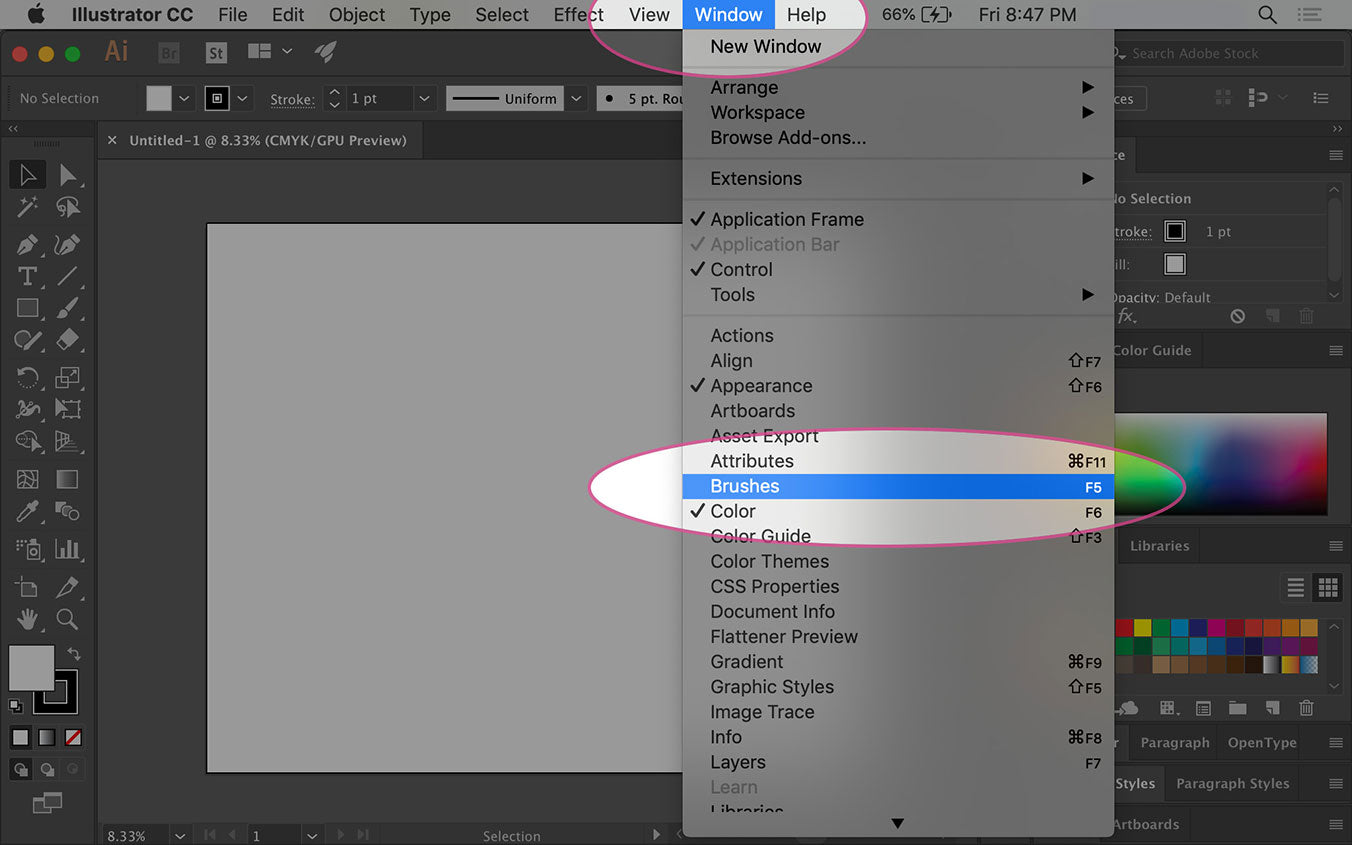
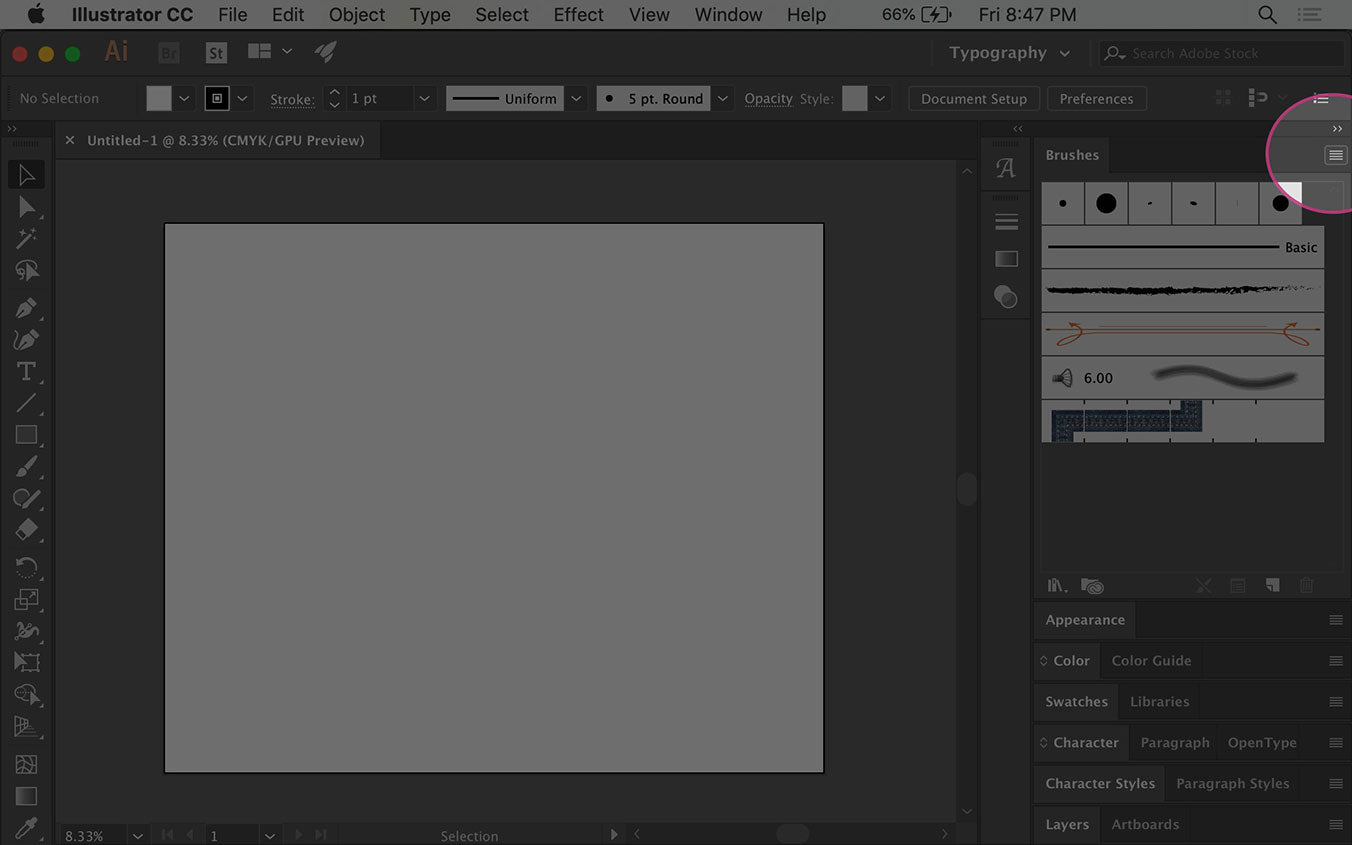
2) Activate Brush Palette options menu
With the brush palette displaying, click on the brush palette menu button to activate the options menu.
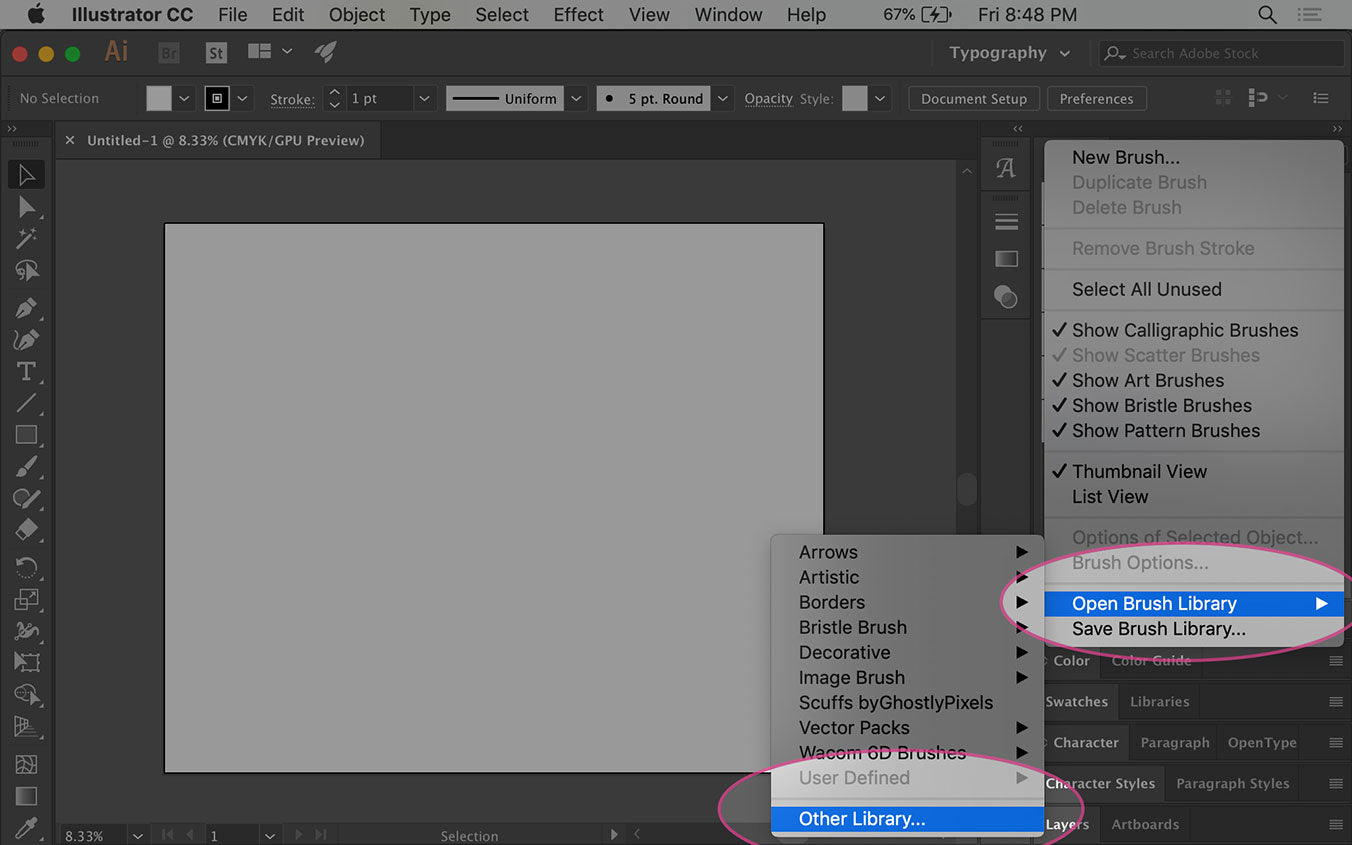
3) Load the brushes
Via the Brush palette option menu, select Open Brush Library > Other Library…
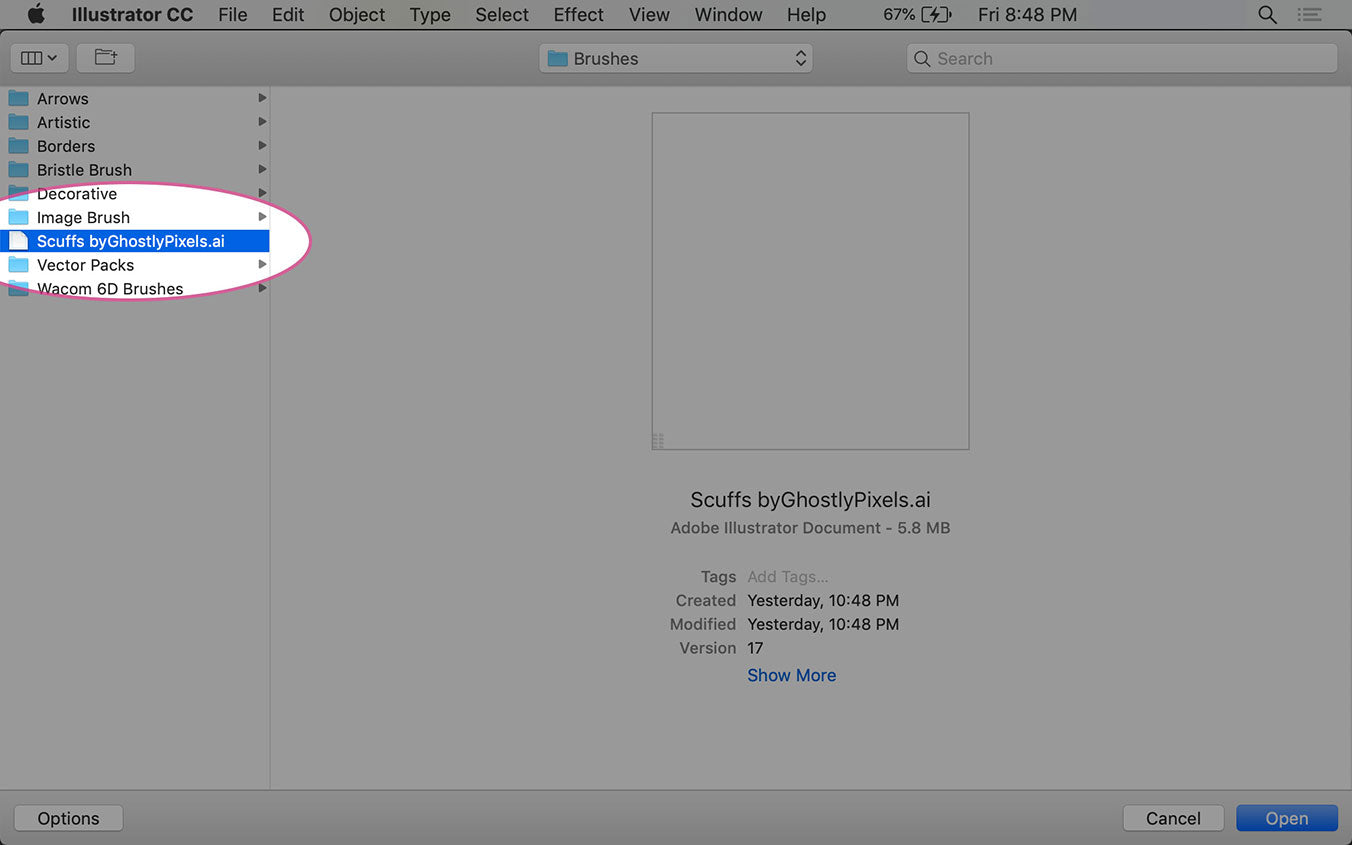
4) Navigate to the desired brush .ai file and load it
Navigate via your operating system’s folder dialog window to where your .AI custom brush set is located. The location of your brush file is determined on where on your hard drive you downloaded it to (the below image will vary for every user based on operating system and where they have their brush file downloaded to).
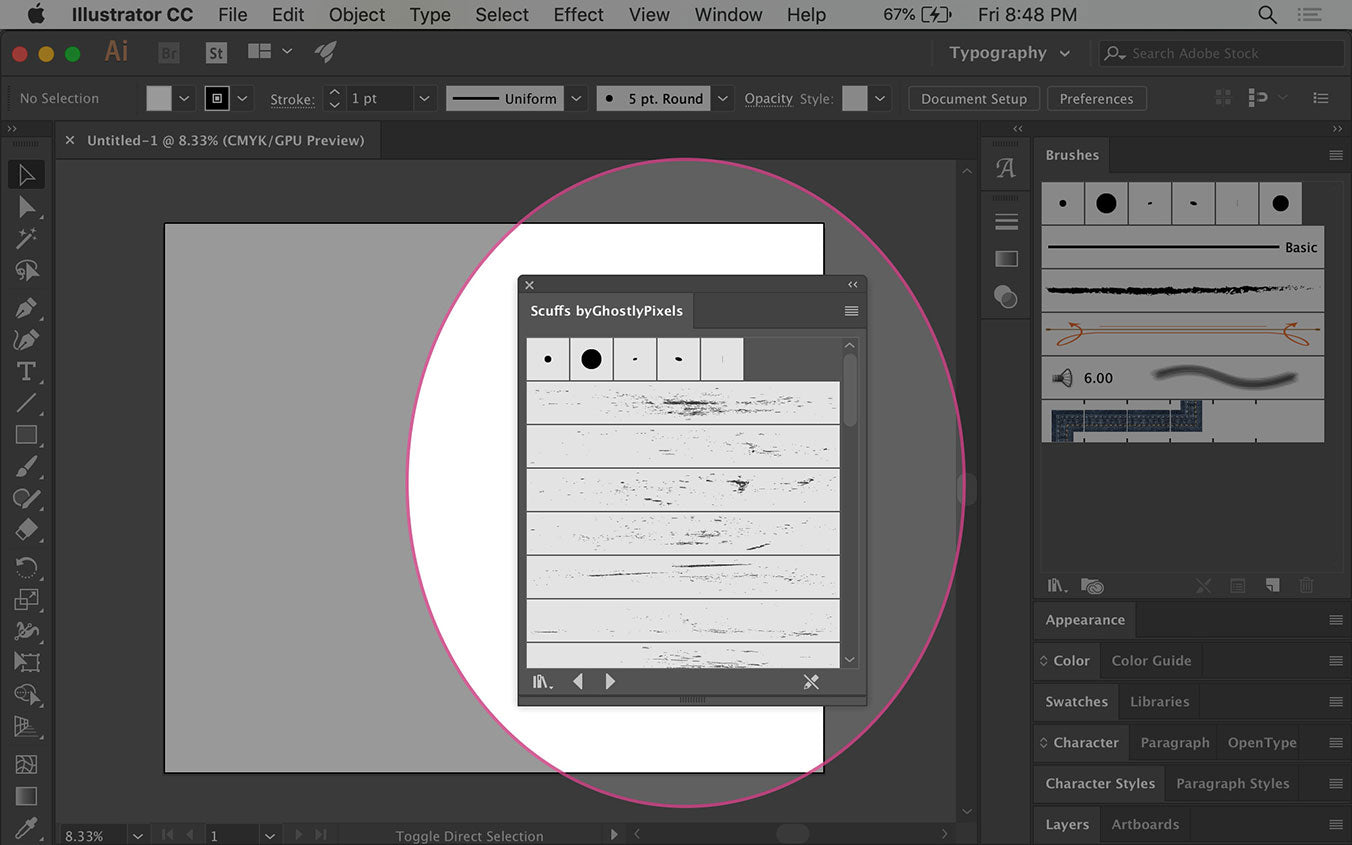
5) View the brush palette
The brush palette you just loaded will now display on your screen alongside any other brush collection you already have loaded. Note: It probably won't dock with your other Illustrator palettes.
Pro Tip:
The .AI filename extension is what illustrator uses for brush sets. This can be confusing since .AI is the same extension as default native Adobe Illustrator files. Oh well, they didn’t ask me, so….
So where are Illustrator Brush files stored?
This isn’t typically necessary to know, but sometimes it can be helpful if you want to navigate directly to Illustrator brush presets directory. The directory path to navigate directly to Illustrator brush directory on your computer hard drive is:
Adobe Illustrator (Version) > Presets > (Language) > Brushes > (folder)
Check out this distressed brush set if you want to easily roughen up your Adobe Illustrator project.